Hey there, fellow yarn enthusiasts! Today, I’m diving into a project that brings a warm smile to my face—the crochet granny square baby bonnet. You know, there’s something undeniably heartwarming about crafting something lovely for little ones, and this project is no exception. I remember the first time I came across a granny square pattern—I was hooked! The colors, the texture, and the sense of accomplishment that comes from completing each square was exhilarating.
This crochet granny square baby bonnet is especially dear to me because it’s one of the first things I made for a friend’s little bundle of joy. The moment I saw the baby wearing it for the first time, my heart melted. Not only does this bonnet keep tiny heads warm, but it also transforms them into adorable little munchkins. So, whether you are a seasoned pro or a curious newbie, let’s get those hooks moving and whip up something spectacular!
The Joy of Granny Squares: More Than Just a Pattern
Granny squares are not just squares; they are gateways to creativity. The crochet granny square baby bonnet marries traditional charm with modern flair. Each square you create is like a piece of a love puzzle, fitting perfectly to form a wonderful bonnet. With the granny square design, you can mix and match colors, creating a personalized masterpiece that reflects your style.
Using various colors in this crochet granny square baby bonnet allows for endless possibilities. The pattern features four distinct colors that can echo the seasons or the personality of the little one wearing it. Mixing shades of blue, green, and earthy tones transforms this bonnet into a delightful accessory that’s both stylish and practical.
A Focus on Techniques: Mastering the Squares
Getting started with the crochet granny square baby bonnet means becoming friends with the granny square technique. For those new to this concept, don’t worry—each stitch is straightforward, yet the outcome is magical! The iconic double crochet will quickly become your best buddy as you follow the rounds to create those charming squares.
After completing your squares, you’ll notice how they come together seamlessly. I recommend taking the time to familiarize yourself with the slip stitch and single crochet techniques. These elements are crucial in ensuring your crochet granny square baby bonnet looks polished and professional while remaining beginner-friendly.
Materials You’ll Need
- Bernat® Softee® Cotton™ yarn (4.2 oz/120 g; 254 yds/232 m)
- Contrast A Seaside Blue (69011) – 1 ball
- Contrast B Pool Green (69010) – 1 ball
- Contrast C Sandstone (69009) – 1 ball
- Contrast D Feather Gray (69002) – 1 ball
- Size U.S. G/6 (4 mm) Susan Bates® Silvalume® crochet hook
- Susan Bates® yarn needle
Preparation Tips: Set Yourself Up for Success
Before we swing into creating the crochet granny square baby bonnet, I can’t stress enough how important it is to prepare your workspace. Make sure your yarn is untangled and that you’re in a cozy spot with good light. I often find that ambiance makes all the difference, so consider putting on some music or a favorite podcast to keep the vibes flowing while you craft.
Another tip—take some time to practice your gauge! For this project, we need to ensure our 16 double crochets and 9 rows equal 4 inches (10 cm). This step is crucial, as the fit of the bonnet largely depends on working to gauge. Plus, eliminating the need for adjustments makes the finishing process a breeze!
Ready, Set, Crochet: The Instructions
Now that you have everything gathered, let’s jump into the step-by-step instructions for creating the crochet granny square baby bonnet. The full pattern can be accessed via the link below the image, providing all details for your crafting adventure!

Full Pattern: Click Here
Extra Tips for a Flawless Finish
As you create, pay attention to keeping your tension even throughout. An even tension ensures that your crochet granny square baby bonnet looks polished and consistent. Don’t hesitate to unravel and redo if you feel something doesn’t look right; it’s all part of the crafting process!
Also, be sure to weave in your ends thoroughly once you’ve completed your bonnet. It’s tempting to rush this part, but it truly affects the finished look of your creation. Plus, think of it as a little wrap-up party for your beautiful work!
Design Considerations: Shaping Your Bonnet
As you work on your crochet granny square baby bonnet, consider how each square contributes to its shape. The slightly rounded corners give the bonnet its charming profile, and this feature isn’t just for aesthetics. It allows for a snugger fit, keeping it secure on your little one’s head. I often find that paying attention to these details elevates my projects to new heights!
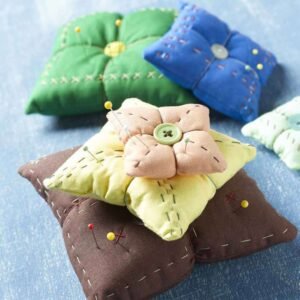
Think outside the box with patterns too! You can add embellishments like small flowers or buttons to the bonnet’s front for an extra wow factor. This also allows you to create one-of-a-kind pieces that could even serve as heirlooms one day, and wouldn’t that be lovely?
Celebrate Your Craft: Reflect and Inspire
Completing the crochet granny square baby bonnet is not just about finishing a project; it’s about celebrating the creativity and skills you’ve honed along the way. Each stitch you made reflects your personal touch and love for the craft. Revel in that feeling and maybe even take a moment to snap a photo of your finished work—you deserve the recognition!
As you embark on more projects, don’t forget to explore the treasure trove of creativity waiting for you. There are tons of amazing articles on the blog that can inspire your next crafting journey. So why not discover another gem I’ve prepared by clicking here? Your next favorite project is just a click away!
Crafting the crochet granny square baby bonnet is an adventure filled with joy and creativity. I hope you enjoyed this journey and feel inspired to create something beautiful for someone special. Now go out there, keep stitching, and share the love!