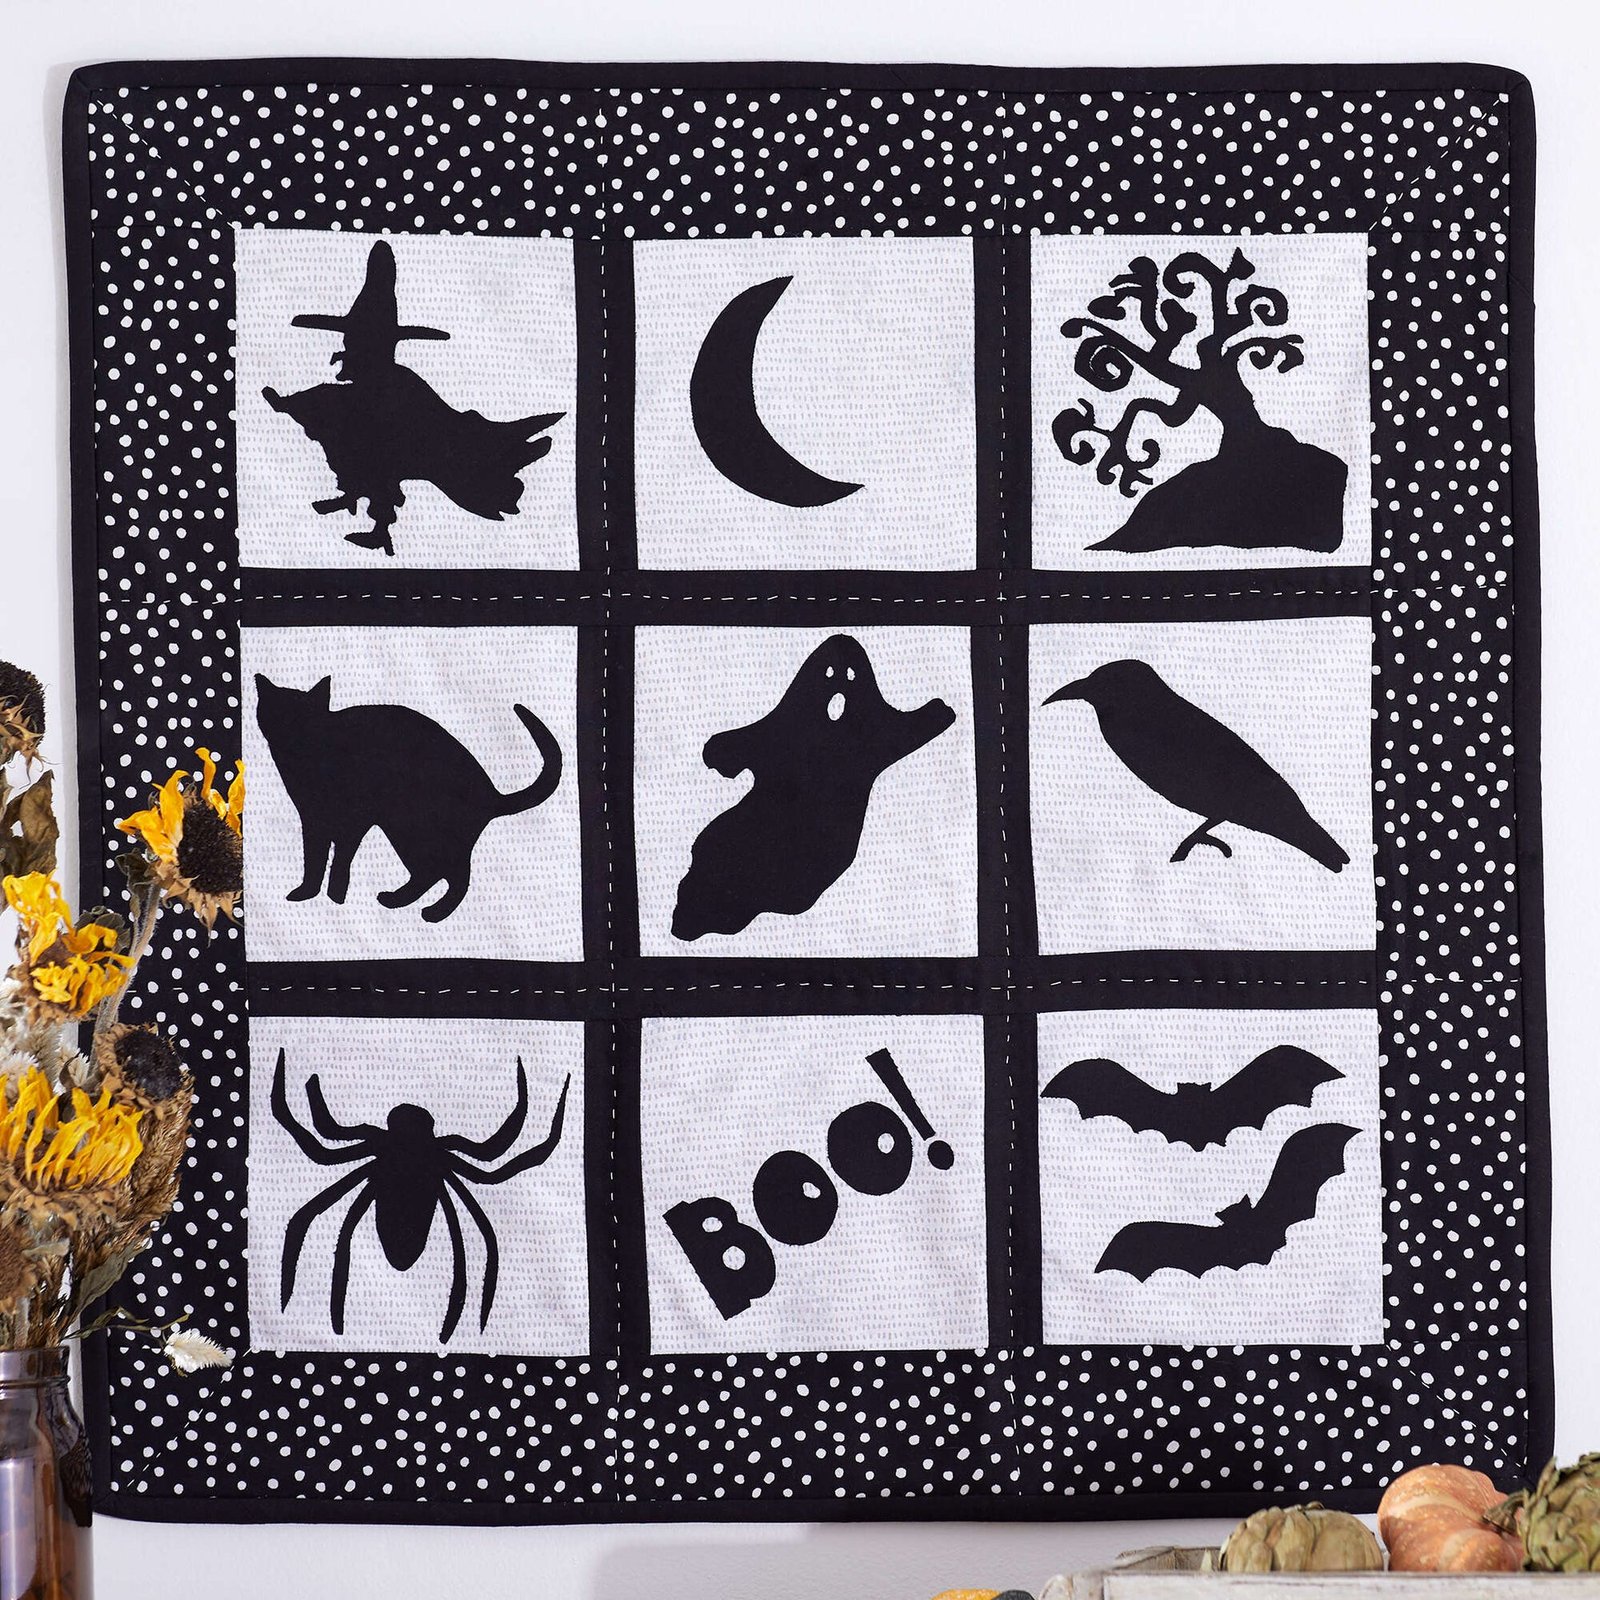
Hey there, quilting enthusiasts! Karine here, and today I’m thrilled to share a fun project that’s perfect for the spooky season—the Halloween Silhouette Quilt! I remember the first time I tackled this pattern; I was trying to find a way to add a little festive charm to my home without going overboard. This quilt became my favorite way to celebrate Halloween in style. There’s just something about working with contrasting colors and fun designs that sparks joy during fall!
This quilt pattern is not just about adding an aesthetic touch; it also embodies the spirit of creativity. Each appliqué piece tells a little story, adding a personal touch to my home decor. Plus, it’s a great opportunity to gather friends for a bit of sewing and spookiness. Whether you want to quilt solo or make it a social event, the Halloween Silhouette Quilt pattern is sure to bring the festive vibes!
Fun Fabrics and Thread Choices
The fabric choices for the Halloween Silhouette Quilt can really make or break your quilt’s aesthetic. I love digging through my fabric stash to find the perfect bold patterns and colors to complement the spooky motifs. Balancing the light background against the bold sashing and appliqué provides a beautiful contrast that really pops!
Using Coats & Clark Dual Duty thread really elevates your sewing experience—trust me, it holds up well under stress! Not only does it look great, but it’ll keep my quilts intact for years to come. So, get excited about the fabric selection; it’s a crucial part of making your Halloween Silhouette Quilt distinctively yours!
Let’s Gather Our Materials!
- Coats & Clark Dual Duty XP® all-purpose thread
- Coats Bold Hand Quilting Thread*
- ½ yd (45.72cm) light background fabric
- ½ yd (80.01cm) solid black sashing/appliqué/binding fabric
- ¼ yd (30.48cm) outer border fabric
- 1 yd (.91m) backing fabric
- 34″ x 34″ (86.36cm) batting
- Paper-back fusible web
- Large-eye hand sewing needle
- ¼” (.64cm) foot (optional)
*You may also use Coats & Clark Dual Duty Plus Hand Quilting thread.
Prepping for the Quilt
Before we dive in, let’s talk about preparing our materials. I always like to lay everything out before I start cutting. It not only reduces the chances of making mistakes but also keeps my workspace organized. Be sure to trace your appliqué shapes onto the fusible web meticulously; a little preparation goes a long way in avoiding errors later!
Also, check your fabric for any wrinkles—iron them out before you cut. Trust me, you’ll thank yourself later when you don’t have to deal with all that headache during assembly. Just take a deep breath and enjoy the process. Happiness is key when creating your Halloween Silhouette Quilt!
Step-by-Step Instructions:
Now, let’s get into the good stuff—the step-by-step instructions for creating your very own Halloween Silhouette Quilt! The detailed pattern can be found by following the link below.
Full Pattern: Click Here
Additional Tips for Success
One essential tip for working with the Halloween Silhouette Quilt pattern is to take your time when assembling the blocks. Don’t rush it! Getting your appliqué just right is essential, and a carefully placed motif can make a world of difference in the final look of your quilt.
Another tip: if you choose to wash the quilt later, be sure to use a narrow zigzag stitch around the appliqué motifs for sturdiness. It adds a lovely touch, too! Remember, details matter in the Halloween Silhouette Quilt!
Advanced Techniques to Try
Once you become familiar with the basics, why not explore more advanced techniques? For example, experimenting with different textures in your fabric choices can create a visually striking Halloween Silhouette Quilt. Consider adding stash fabric with sparkles or even velvet to give a touch of luxury!
Perhaps you want to try free-motion quilting for the first time? You could use it to create spider web effects or even whimsical curves throughout the quilt! The world is your oyster when it comes to techniques, and every stitch is a chance to express your creativity.
Celebrate Your Craft!
As you finish your Halloween Silhouette Quilt, take a moment to reflect on your hard work and the joy you’ve poured into it. Each stitch is a small reminder of your talent, creativity, and fun times spent sewing! Celebrate your quilt by finding a special spot to display it—maybe over your mantle, or hang it in your entryway to greet guests.
If you’re intrigued by more projects, I invite you to dive into other articles on this blog. It’s brimming with inspiration and tips! Trust me, you’ll uncover tons of amazing content that can help refine your craft. Plus, I’ve got an incredible piece waiting just for you by clicking here.
Now that we’ve talked about the journey of creating the Halloween Silhouette Quilt, I hope you’re feeling excited to start your very own. Embrace the fun and let those creative juices flow, my friend!


