I still remember the first time I laid my eyes on the beautiful designs of the Solid Squares Quilt.
It felt like a delightful invitation to a world of color and creativity! I was instantly hooked and couldn’t wait to dive into the process of crafting this beauty for my home.
There was something inviting about the simplicity of the squares that made my heart flutter with excitement.
The Solid Squares Quilt isn’t just a project; it’s a journey that lets you express yourself through fabric!
Whether you’re a beginner or an experienced quilter, every stitch brings you joy and satisfaction.
With the knowledge that I could create something wonderful from scratch, I jumped into the preparation stage, eager to explore the textures, patterns, and colors.
Here’s why the Solid Squares Quilt is simply the best – it allows you to play around with a variety of fabrics, showcasing your personal style while using beginner-friendly techniques!
Many quilters start their journey with the Solid Squares Quilt, as it’s not only an ideal way to learn the basics but also a perfect chance to show off your creativity.
Next, let’s dive deeper into why each step of this project can be so fulfilling!
The Solid Squares Quilt can be as intricate or as simple as you want it to be, allowing you to grow your skills while having tons of fun!
There’s really nothing quite like watching patches of fabric transform into a beautiful piece of art!
As with any project, the right materials will set you off on the right foot!
The Solid Squares Quilt requires an assortment of vibrant fabrics and some essential tools to get you started.
Here’s a list of what you’ll need:
– Coats & Clark™ Cotton Machine Quilting Thread, 7450 Temple Gold
– Coats & Clark™ Quilting and Piecing Thread, 450 Nugrey
– 1 pre-cut fabric pack containing (85) 5″ (13cm) squares or 2 packs containing 42 squares*
– ¼ yd (.25m) Inner border fabric
– ½ yd (0.5m) Outer border fabric
– ½ yd (0.5m) Binding fabric
– 3½ yds (2.4m) backing fabric [or enough to piece a 53″ x 62″ (135 x 158 cm) or larger quilt back]
– 50″ x 60″ (127 x 153 cm) batting
*You can also cut your own 5″ (12.5 cm) squares using scraps from other projects.
Now, before we get to the fun part of stitching, it’s essential to have everything organized!
Knowing each material and its purpose will smooth out the quilting process, especially when tackling the Solid Squares Quilt!
Make sure your workspace is clutter-free, and you have all the tools ready to go!
This makes things so much easier as you start piecing this fantastic quilt together.
Now that we have our materials and workspace ready, let’s break down the process of creating the Solid Squares Quilt!
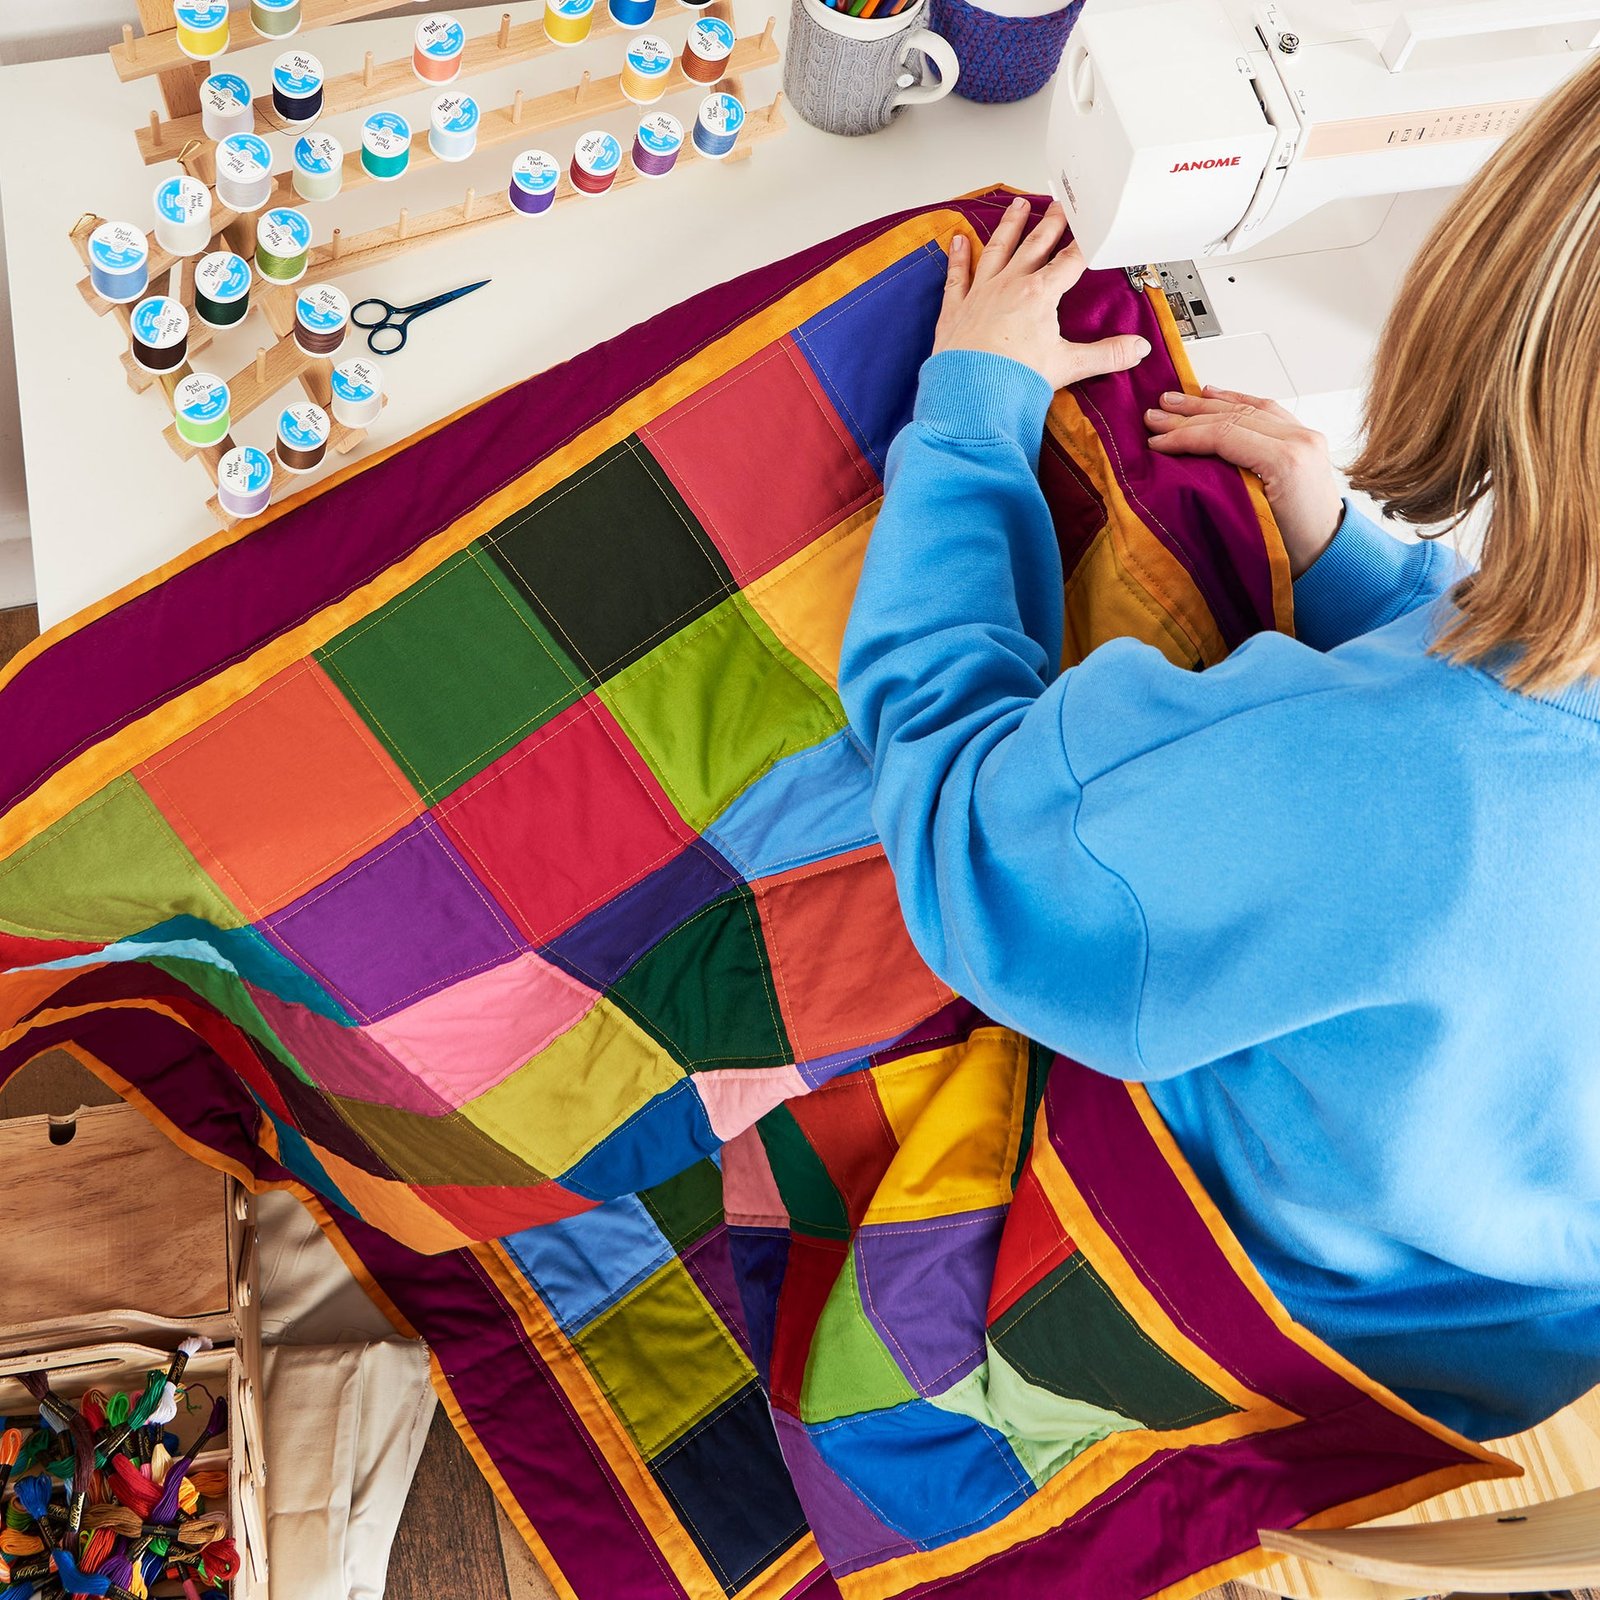
Our step-by-step guide is just below the image, so let’s get started!
Full Pattern: Click Here
First, don’t forget to gather all your materials!
With everything at hand, we can take on the project head-on!
1. To start, there are 10 rows of 8 squares each; lay out your 5″ (12.5 cm) squares.
Have fun arranging and rearranging the colors until they speak to your creative side!
2. Number each row before moving the squares around.
Remember, stack the squares by number for easy assembly later!
3. Thread your sewing machine with Coats & Clark™ Quilting and Piecing thread on top and in the bobbin.
Nugrey is a neutral that will blend with the square colors seamlessly!
4. Starting with Row 1, begin to sew the squares together while maintaining an accurate ¼” (.6cm) seam allowance.
Press the seam allowances together toward one side once done!
5. Next, sew Row 2’s squares together, pressing the seam allowances in the opposite direction from Row 1.
6. Repeat these steps for the remaining rows to keep that rhythm going!
It’s time to connect these rows!
7. Align Row 1 with Row 2 and pin them together at the seams, nesting the seams.
This is extra easy since you’ve pressed them in opposite directions!
8. Go ahead and sew Rows 1 and 2 together and press that seam down (toward row 2).
9. Continue this process, working in pairs, such as Rows 3 and 4, 5 and 6, and so on.
Remember, the goal is to align everything beautifully!
Now, let’s finish the quilt top with some charming borders!
1. Join the 1½” (4 cm) strips end to end and press those seams open.
Subcut into two 47″ (120cm) strips and two 40″ (102cm) strips for the borders!
2. Sew the 47″ (120cm) strips to the sides of the square unit.
Don’t forget to trim off any extra and then sew the 40″ (102cm) strips to the top and bottom!
3. For the outer border, join the 3½” (9 cm) strips end to end, subcut into two 48″ (122cm) strips and two 45″ (114cm) strips, repeating the previous process!
Now that the quilt top is ready, let’s move on to the quilting part!
1. Layer the backing with the batting wrong side up and the quilt top right side up.
Secure everything together using basting spray or pins as you wish!
2. Thread your machine with Coats & Clark™ Cotton Machine Quilting thread and attach the walking foot.
Quilt as desired, including stitching next to each joining seam for easier movement!
3. Trim that batting and backing to match the quilt top, basting around the edges with longer stitches to secure it beautifully!
Now we’re almost there – onto the binding!
4. Sew the binding strips together using diagonal seams and press them open.
Then fold the binding lengthwise, wrong sides together and you’re ready!
5. Start pinning the binding to the right side of the quilt while leaving about a 6″ tail free at the beginning.
This will be so satisfying, trust me!
6. Sew the binding onto the quilt top, stopping to miter (fold diagonally) each corner as you go!
7. Finally, roll that binding to the back of the quilt and hand stitch in place!
Getting to enjoy the finished Solid Squares Quilt is always delightful!
It’s rewarding to know that you’ve just created something unique and beautiful.
The best part is, you can now take pride in sharing your work and the journey you took to create this lovely quilt!
As you reflect on these steps, consider all the colors and patterns you played with.
This project offers amazing opportunities to unleash your creativity.
If you enjoyed this project and the process, you’re in luck!
Our blog has tons of content waiting for you to dive into!
You’ve got incredible pieces like this one, just waiting to be discovered.
Check out other inspiring articles I’ve prepared, all designed to ignite your creative spirit!
Feel free to explore what else we have by discovering amazing ideas by clicking here!
Embrace the process and don’t forget that every quilt you make tells a story – yours!
Cheers to your journey with the Solid Squares Quilt and many more to come!
Let’s keep creating and having fun with every stitch we make.


