Have you ever wanted to bring the vibrant beauty of summer flowers directly into your home?
With the Summer Flower Wall Hanging, you can do just that!
Every time I glance at my completed wall hanging, I feel a burst of joy, as if all those beautiful blooms are bringing a little piece of the garden indoors!
It’s amazing how this project can instantly brighten up a room and add a personal touch that store-bought decor just can’t match.
Aside from being visually delightful, the Summer Flower Wall Hanging is also incredibly fun to make!
This is a superb beginner project for anyone looking to explore free motion quilting, since the beauty is in the freedom of expression—there’s no straying from perfection here, just creativity!
Let’s dive into the context of this exciting project!
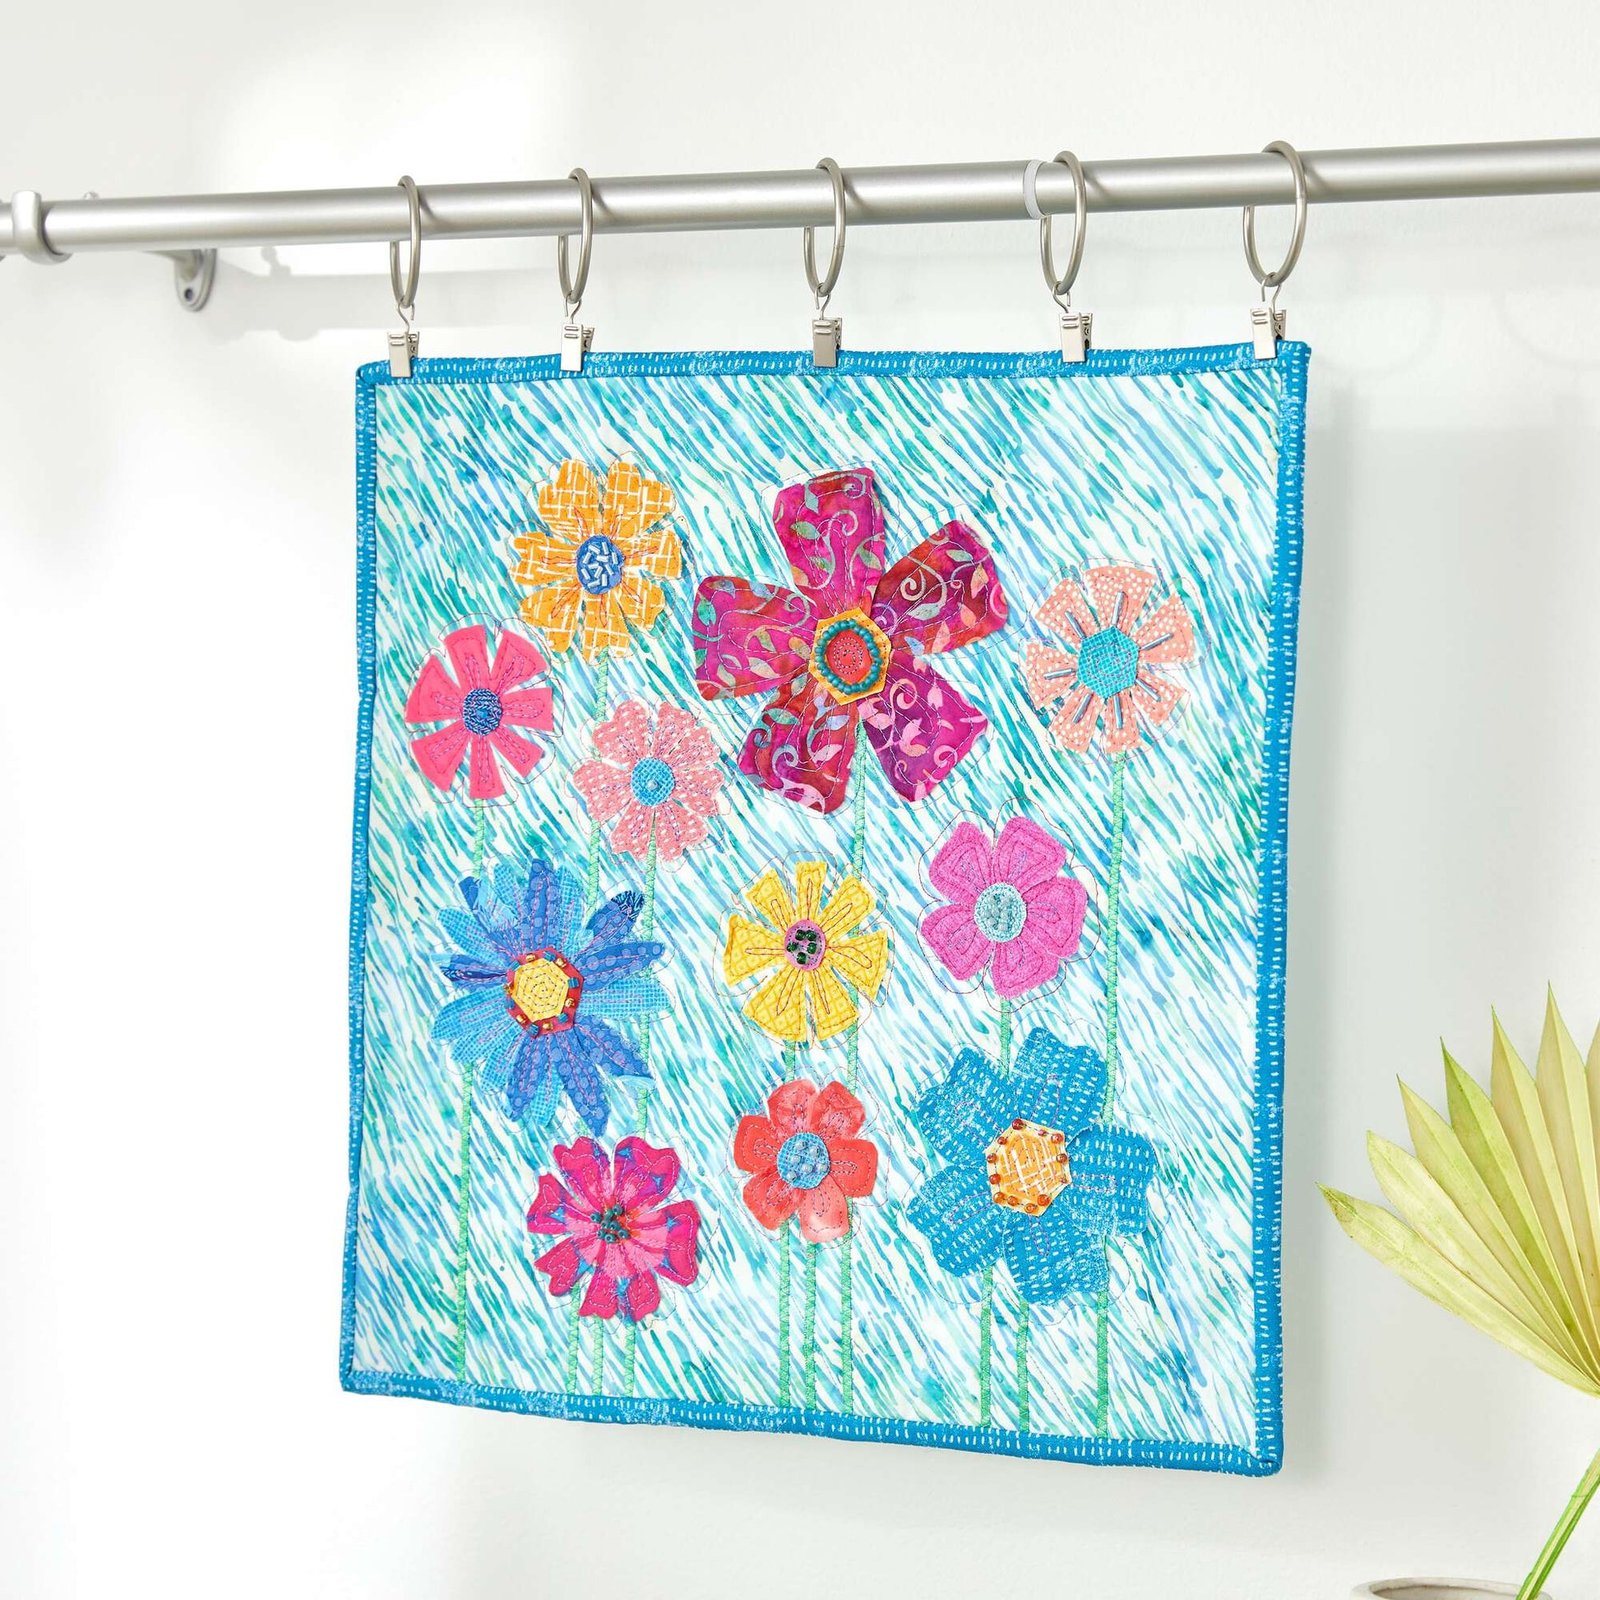
The Summer Flower Wall Hanging features a beautiful array of flowers crafted using free-motion appliqué techniques, perfect for those warm, sunny days!
This method encourages you to express your artistic spirit, allowing the flowers to bloom within your fabric, much like they do outside!
It’s not just a simple project; it’s a chance for you to play, experiment, and create something uniquely beautiful!
Let’s talk about some fascinating techniques involved!
This wall hanging is designed specifically to introduce you to the world of free-motion quilting.
You’ll get to practice stitching with ease, playing with various color palettes and layering techniques to give your flowers depth and dimension.
What’s truly special is getting comfortable with machine quilting, while enjoying a stress-free project that encourages lots of practice and creativity!
So, are you ready to gather your supplies?
Here’s a list of materials you’ll need to embark on your journey with the Summer Flower Wall Hanging!
• Coats & Clark™ Polyester Machine Embroidery threads
• Coats & Clark™ Dual Duty XP® All-purpose thread
• Coats & Clark™ Cotton Machine Quilting thread
• ½ yard (.46m) cotton for the background
• ¼ yard (.23m) binding fabric
• Scraps for flowers
• Cotton Batting
• Fabric glue stick
• Assorted beads
• 1/8″ (3mm) wide ribbon for stems
• Walking foot/dual feed foot
• Free motion presser foot
Before you start, a few preparation tips to keep everything smooth sailing!
First, lay out all your supplies and ensure that you have everything at hand before diving into the fun!
This not only keeps your workflow uninterrupted, but it also helps you visualize the project ahead!
Consider washing and pressing your fabric too; this will give you a crisp, professional finish, and ensure everything is wonderfully clean for your beautiful creations!
Alright folks, now it’s time for the magic to unfold!
In this section, I’m excited to share the step-by-step instructions for the Summer Flower Wall Hanging!
Be sure to check out the full pattern via the link below the image, where you’ll find detailed steps to guide you along the way!
Full Pattern: Click Here
Now, let’s get to the nitty-gritty of creating this masterpiece!
1. Begin by sandwiching your two background fabric squares with cotton batting!
Ensure that the right sides of the fabric face out!
2. Thread your machine with Coats & Clark™ Machine Quilting thread on top and in the bobbin!
3. Attach your walking foot/dual feed foot!
This tool is fabulous for keeping those layers of fabric from slipping as you quilt!
4. Stitch your quilting lines however your heart desires!
Don’t stress about perfect lines—allow yourself to wander a bit!
5. Trim your quilted piece to a neat 16″ x 16″ (41cm x 41cm)!
Next up, let’s plant your flowers!
1. Arrange and glue your flowers in place, keeping them 1½” (4cm) in from the edges!
This ensures you have room for the binding!
2. After the flowers are set, it’s time to add those charming ribbon stems!
Lift the flowers slightly to insert the stems underneath, and then re-glue as needed!
3. Now, with Coats Cotton® Machine Quilting thread threaded top and bobbin, select a zig-zag stitch at width 4 and length 4!
Zig-zag those stems in place!
4. If you’re new to free motion, practice using fabric and batting scraps first!
Remember, it’s all about moving the fabric under the needle, so relax and enjoy this beautiful process!
5. Once you’re confident, start with the flowers!
Begin stitching around each flower near the edges while adding a bit of flair to the larger petals!
6. Next, add colorful loops in the centers of your flowers, which will add vibrancy and delightful detail!
7. Don’t forget those flower centers!
Glue them in place and stitch them down securely for that perfect finishing touch!
Almost done!
For that extra glam, hand stitch some beads to the center of each flower!
These will add a stunning shimmer to your wall hanging!
Now let’s tackle the binding!
1. Stitch those binding strips end to end to form one long strip that will give your wall hanging a clean, finished look!
2. Fold the binding in half, wrong sides together, and press it well!
3. Next, place that folding strip on the right side, starting at the center bottom of your square!
Begin stitching about 3″ (8cm) from the end of the strip, and follow the edges as you go!
4. As you reach the corners, fold the miter as needed and keep stitching as you turn!
5. When you’re about 3″ from where you began, cut a piece of the binding from the strip to measure!
This will ensure a clean join at the end!
6. And voilà! You’ve completed the free motion flower garden wall hanging!
Now for some additional tips: as you work on your Summer Flower Wall Hanging, feel free to test various thread colors and fabric styles!
Using assorted fabrics for the flowers can help create a beautiful bouquet effect that’ll make your wall hanging gloriously unique!
Don’t shy away from playing with bead placements either; they can add an unexpected pop to your work!
If you get stuck or want to perfect your skills, remember that practice makes perfect!
Keep working on your technique with small pieces until you feel comfortable enough to tackle the full wall hanging!
Now let’s chat about the creative side of things!
When designing your Summer Flower Wall Hanging, consider how the colors work together and how you can bring out the unique beauty within each flower!
Each choice—whether a bold color splash or a soft pastel—will make your wall hanging uniquely yours!
If you want to take it to the next level, try adding a quote, or even a printed fabric at the back for a quirky surprise!
As you stitch, allow your personality to shine through!
Wrap-up time!
Every experience with your Summer Flower Wall Hanging allows us to celebrate creativity, adaptability, and personal expression!
With each stitch, you’re not just creating a piece of decor; you’re pouring your love, happiness, and imagination right into your home!
I’m thrilled to know you’ve embarked on this delightful journey!
If you’re hungry for more inspiration, I invite you to explore other articles in this blog packed with tons of amazing content for your crafting pleasure!
Trust me, you won’t want to miss the incredible piece I’ve prepared that you can check out by clicking here!
In closing, the Summer Flower Wall Hanging reminds us that joy and beauty can blossom in the simplest of projects!
Embrace your creativity, have fun with each stitch, and let those flowers bloom in a truly marvelous way!